Select topic to reveal solution.
SURFACE COATED FLOORS
All Urethanes-including Polyurethane, Oil Modified, Waterborne and Moisture Cured-and “Swedish”/Acid Curing Resins (Conversion Varnishes)
ROUTINE MAINTENANCE:
Sweep, vacuum or dust regularly as needed but at least weekly. NEVER use spray, dusting treatments.
For Custom Finished Floors
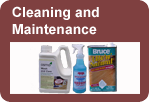
Use a No Wax Floor Cleaner such as Woodwise, Glitsa Clean, BonaKemi’s Professional Series. Custom finish and pre-finished wood manufacturers do not recommend using vinegar and water. Contact a floor professional if in doubt.
Apply the solutions according to either method explained below.
Method 1: Spray the solution on the floor and wipe it up with a slightly damp (almost dry) mop or cloth.
Method 2: Dip a mop, mop cover or cloth in the solution and squeeze it out until it is nearly dry (never wet) then damp mop the floor. We suggest you select a mop that you use only for wood floors. We recommend a mop similar to the mop kits offered on the www.cleaningwoodfloors.com site.
For Prefinished No-Wax Floors
Use the recommended cleaner designed for each brand of pre-finished floor. If you are unsure as to what brand of pre-finished floor you have, we recommend using “Woodwise No-Wax Cleaner” or “BonaKemi Professional Series” which are a general all-purpose wood floor cleaner for top-coated, non-waxed floors.
NOTE: Most pre-finished wood floors do not recommend vinegar and water, so it is important to know what brand and kind of floor you own.
Never use wax, acrylic solutions, or oil treatments on top-coated floors. These may leave surface films that become dull over time and will prevent re-coating the floor in the future.
“RECONDITIONING”:
For Custom Finished No-Wax Floors
Contact a floor professional and follow his/her recommendations. Often top-coating (instead of refinishing) can be done if the finish has not worn down to the raw wood and it has been cared for according to the instructions above.
For Prefinished No-Wax Floors
Use various “refurbishing” types of products available for each brand of pre-finished flooring. Consult care instructions.
NOTE: Often completely refinishing the floor is the only way to ensure lasting results.
WAXED FLOORS
(All pre-finished and custom waxed floors)
ROUTINE MAINTENANCE:
Sweep, vacuum or dust at least weekly or as needed. Never damp mop with water.
For Custom Finished Wax Floors
Buff areas by hand or with a buffer to remove scuffs or dull areas. Re-wax areas that show traffic patterns using waxes made for wood floors.
For Prefinished Waxed Floors
Buff and re-wax areas as recommended by product manufacturer. Use recommended maintenance products. If you don’t know what brand of floor you have but do know it is a waxed floor, maintain with Duraseal brand paste wax or mop-on wax such as Dura Finish.
Never use water on a waxed floor.
“RECONDITIONING”:
For Custom Finished Waxed Floors
Strip off wax with a chemical stripper such as Bruce “Clean-n-Strip”. Apply new wax formulated for wood floors such as Bruce “Lite-n-Natural” or “Dark-n-Rich” or Duraseal brand paste wax
For Prefinished Waxed Floors
Use manufacturer’s recommended stripper and wax product.
NOTE: You can find these wax products and cleaners for your wood floors at www.cleaningwoodfloors.com .
Stop Dirt and Grit!
It doesn’t matter what finish you have on your floor, there is one thing to remember…. Dirt and grit act like sandpaper to destroy the protective surface of a wood floor. Vacuum, sweep, and dust mop regularly as described in the floor care section of this web site.
Apply Floor Protector Pads!
All “moveable” pieces of furniture need soft clean pads on the bottom of the legs or supports. There are many kinds and sizes. See EZGlides, Safeglides, Wood-Pro, Slickstick on our online store www.cleaningwoodfloors.com.
Examine the condition of these pads regularly for wear and grit.
Use Outside Door Mats!
Dirt and grit from the outdoors need to be stopped at the door. Walk-off mats placed at each exterior door will trap harmful particles outside. A throw rug or small area rug just inside the door will add more protection.
Use Wood Floor Cleaners Made Only for Wood Flooring !
All cleaners are not the same. A cleaner made for wood cabinets or vinyl floors should not be used on your wood floors. Wood floor cleaners (i.e. Woodwise, Glitsa, Bona Kemi Professional Series) are compatible with all top coating products on the market. Some generic cleaners purchased at supermarkets or hardware stores actually cause problems such as dullness and residue. Products containing oil or acrylic ingredients should not be used on polyurethane, Swedish finish, or water based urethanes.
No High Heels!
High heels concentrate a person’s weight on a small point (estimate: 125 lb. Person = approximately 2,000 lbs per inch when taking a normal step). This kind of force can dent and pit wood, fracture ceramic tile, and perforate vinyl. While high heels in good condition may not damage wood floors, we recommend a “no high heels” policy.
NOTE: A piece of gravel in the sole of a normal shoe will cause the same damage as high heels.
Pets are Okay!
Dog and cat toe nails can scratch a wood floor. It is a good idea to trim them regularly and try to contain vigorous play to carpeted areas. Most toenail scratches are removed whenever a floor is top-coated with a fresh coat of finish. They can be buffed out of waxed floors as well. One of our customers has tried an ingenious solution to the toenail problem. This Golden Retriever, Sadie, loves her socks!

Some finishes like urethanes and Swedish-type finishes are essentially waterproof. This is a great finish for pet households because pet urine, spills from food and water bowls will not hurt these floors if cleaned up within a reasonable amount of time.
Use Area Rugs!
Some areas of the house experience more wear than others. Kitchens (especially in front of the sink) always have a lot of traffic. Area rugs can be used to protect high-traffic areas. Make sure they are kept dry and clean. Shake out and vacuum throw rugs frequently.
Be Careful When Moving Heavy Furniture or Appliances!
Remember to pick up heavy furniture and do not slide anything across the floor. It is a good idea to rent a furniture dolly with soft rubber wheels or an “air sled.” See Woodwise Floorguards on our floor protection section at www.cleaningwoodfloors.com. These “Floorguards” enable you to move your appliances forward for servicing without gouging your floor.
Use Trivets for Indoor Potted Plants!
Never place plants directly on a wood floor even if they are in a waterproof saucer. Always use trivets or plant stands under the pot and saucer so that air can circulate underneath. This will prevent condensation on the saucer from damaging the wood floor. It will also be easier to see if the plant is over-watered or if water has spilled onto the floor.
Never Use Household or Wood Bleach on Stains!
Often people have asked us for help after they have been told by paint stores to bleach out stains in their floor. DO NOT USE BLEACH OR OTHER CHEMICALS to remove stains from wood floors. These chemicals break down the fibers and structure of the wood. The bleached area of the floor will not stain or look like the rest of the floor. You basically will have a larger, different looking stain now and one that will need board replacement for sure. Major stains from potted plants, pet urine, ink, burns, etc. in wood floors can often be sanded out in a localized area or by refinishing the whole room. Instead of bleaching:
- Use a hand scraper and scrape the blade over the stain a couple of times. If you expose raw wood, then the area can be sanded and the stain removed.
- More difficult stains usually can be repaired replacing the damaged boards.
Both of these processes are easy for an experienced wood floor professional (list available www.nwfa.org). “Blending” in of an area usually does not match well if the rest of the floor is over two years old. The whole room may need to be redone. Follow the recommendations of a professional.
SCRATCHES
Dull Areas Due to Traffic Wear Patterns
The most important thing about scratches is to find out what is causing them. Then take some preventive measures to remedy the problem. Scuffing or high traffic wear areas mean gritty shoes, dirty floors, or furniture without protectors.
What can YOU do? A throw rug may be needed to protect from further damage. If your floor is only lightly scratched and not worn down to the raw wood, sometimes light buffing with a white polishing pad can shine up a dull (scratched) area. The damage becomes less obvious.
One or Two Light Scratches
Sometimes a light scratch appears on the floor. This may be from grit under a chair leg or a box being dragged on the floor. It shows as a small light (sometimes white) mark. Wipe the scratch with vegetable oil on a paper towel to darken the line. The oil will make the scratch less obvious until the floor is re-coated (top-coated) or refinished.
Deep Scratches or Gouges
Scratches that have penetrated the finish and exposed the raw wood can not be repaired easily. The only solution is to putty the damaged board and wait until the floor is refinished. Repairs often make the damage more obvious because the newly repaired wood does not match the existing, older floor color. Consult your flooring professional (list available www.nwfa.org) when the scratches are considered major.
BLACK SHOE MARKS
Some shoes have black rubber soles which do leave black lines on the floors. A trick we learned from airport maintenance crews is to use a tennis ball like an eraser. IT WORKS!!! Also certain rubber soled shoes rubbed over the mark get the same result. A white polishing pad will also work.
GAPS
Seasonal Gaps:
Some gaps may appear between boards during the heating season. During the heating process, the floor will dry out, boards will shrink in width, and gaps may form between boards. Later when the heat is turned down or off, the boards expand and the gaps close. You need to observe the floor through a one year cycle to determine what is gong on with the floor. This is a normal occurrence which can be minimized by installing a humidifier on the heating system which will keep the air a constant moisture content (30% to 50%).
Permanent Gaps:
Gaps that do NOT close up are abnormal. These can be caused by:
-Improperly stored wood prior to installation at the distributor.
-Wet masonry, plaster, concrete, paint, tile work done while wood is delivered and being installed.
-Installation of crooked boards which should have been discarded.
-Heating unit not working properly at the time of delivery/installation.
-The humidity may be too low during the heating season.
NOTE: The temperature and humidity should be kept at normal living conditions even when unoccupied before, during, and after installation of wood floor.
Prevention
The flooring professional/installer needs to make sure that the wood, sub floor, and air have reached a moisture equilibrium before it is laid. Using a moisture meter is the only way to determine when this level has been reached.
Solution
If one of these scenarios has taken place and permanent gaps appear, small gaps can be filled with putty. Woodwise Pre-finished Filler is available for wood floors that have finish on them. Large gaps (larger than 1/16”) should not be filled. Board replacement may be necessary. Seek the advice of a flooring professional or NWFA certified wood flooring inspector (list available at www.nwfa.org ).
CUPPING
Problem Cupping:
Causes
Cupping is caused by one thing: Moisture. Excessive moisture on the underside cases expansion which in turn cause the edges raise. Demonstration: Cut a narrow piece of paper and moisten one side. It will immediately curl up. This is what is happening to your floor.
Contributing Factors
No vapor barrier in crawl space, moisture in crawl space, foundation vents blocked, plumbing leaks ( i.e. ice maker, dishwasher, toilet), excessive use of water during cleaning process (no string or sponge mops). You must find the problem before attempting to fix the floor.
Solutions to Problem Cupping
The floor needs to be dried out either requiring at least three months of constant heating of the area or by hiring a water damage specialist who can dry the floors in a week or so. Most floors will dry after one full winter heating season. After the floor is dried to a normal percentage, the floor may be refinished.
Normal Cupping:
Causes
Some cupping is considered normal especially in wider plain sawn planked floors over 4”. On any plain sawn boards, the growth rings of the tree travel in a slightly curved pattern from one side of the board to the other. With seasonal changes in climate and humidity, the wood responds by adding and losing moisture causing the wood to cup. This can happen to a 21/4” board as well.
Solutions to Normal Cupping
A humidifier attached to the heating system will keep a home at constant humidity that is normal to the region. Cupping often looks worse than it really is if viewed across a large clear expansive of flooring with a bright light source. Furniture and rugs will break up the angle of view. The heater needs to be working and set normal heating temperature (60 - 80 degrees) even if the home is not occupied. The moisture content of the air needs to be 30% to 50%. Large changes in heating temperature affect the moisture/humidity conditions of the room. Colder air adds moisture while warmer air subtracts moisture (example: forced air heating).
DULL AEAS
(not due to wear patterns)
This is a tough situation. Before you try to solve the problem make sure that a matte or satin finish has not been applied to the floor to begin with. If your floors were shiny and now they are dull, there are some common causes. The first thing to notice is whether the whole floor is dull or just a certain area.
Whole Floor is Dull:
- This often is a cleaning problem. Your cleaning method may be leaving a film or dirt behind causing the floor to look dull. Some grocery store cleaners leave a residue behind which over time turn the floors dull. USE ONLY CLEANING PRODUCTS MADE SPECIFICALLY FOR HARDWOOD FLOORS that can be purchased through our online store at www.cleaningwoodfloors.com .
- Older waxed floors can become dull also. If wax was used to maintain a floor, it may only need to be buffed or re-waxed. However, if the floor has a “top-coat” on it as many pre-finished floors have DO NOT USE WAX.
Dulling is Localized:
- Cleaning can still be an issue in a localized situation. Cooking areas, dining areas, and entry doors are places that collect food spills, dirt, and grit.
- Surface wear in high traffic areas can cause dulling in localized areas. This usually happens around tables, chairs, a sink, a refrigerator and sliding doors. Graying of the floor is a sure sign of a worn surface coat. This means the floor finish is worn down to the raw wood and needs to be refinished. If the floor is NOT gray yet, re-coating the whole room with one more coat of the same finish is often possible. Re-coating is an easy process and less expensive than re-sanding.
BLACK STAINS DUE TO PET URINE
Black stains due to pet urine are usually found when someone removes carpet and wants to refinish their wood floors. A flooring professional can remove the stained boards and patch in the affected areas. It is not very expensive considering the value that the wood floor has added to your home. Some of these stains will sanded out but many especially in white oak floors will not. If you use a paint scraper, pull across the area a few times and if this exposes clean raw wood then it will be removed during the re-sanding process. If it does not scrape off, then board removal is necessary. Most white oak floors will need board replacement. NEVER, NEVER, NEVER, USE REGULAR BLEACH OR WOOD BLEACH on these or any stains on wood floors. It will not remove stains. It will only damage the cell structure of the wood and make the stain more obvious. You will be damaging the floor.
RUG MARKS
Causes:
Many people are shocked when an area rug is moved and there is an outline of the rug on the floor. Luckily there is no need for panic. If you remove the rug completely, the color will blend eventually but it will take awhile. So be patient!! This happens because the sunlight hits one part of the “uncovered” floor and does not reach the floor under the rug.
Solution:
This discoloration can be avoided by moving the rug often or by using a finish with a UV block when it is time to refinish.
INDOOR POTTED PLANT WATER MARKS
(Also Christmas tree damage)
Causes:
Water marks that appear as black rings on the floor are usually caused by flower pots left in direct contact with the floor. Fertilizers, soil, and plant sprays can also discolor finishes if they are accidentally spilled on the floor. Always repot and apply chemicals in another area without wood floors.
Solution:
Never put potted plants even with waterproof saucers directly on the floor. Place all potted plants on a waterproof saucer or tray. The plant and saucer must then be placed on top of a trivet or stand to leave an air space between the wood floor and the pot and saucer. This will prevent condensation of moisture on the saucer from contacting the wood floor. It will also allow you to observe if the plant is over-watered or if water is spilled on the wood floor.
WALL PAINT ON WOOD FLOORS
There are a couple of things to find out before tackling the clean up of the floor. First of all, what kind of paint was spilled…oil base or latex? Second, what kind of finish do you have on your floor…wax, oil base topcoat, water-base topcoat? Here are some suggestions:
Latex Paint:
On water base floor = use a scrub pad made for wood floors and lightly scrub the area of paint with a wood floor cleaner.
On an oil base floor = Use a product called Goof-Off to clean it off.
On a waxed floor = Use a wax stripping product, then re-wax.
Oil Base Paint:
On a water base floor = Use the scrub pad made for wood floors and wood floor cleaner.
On an oil base floor = Use lacquer thinner on a rag; On a waxed floor = Use a wax stripping product and re-wax area.
On a waxed floor = Use a wax stripping product, then re-wax
SQUEAKS IN FLOORS
A noisy floor means there is movement between boards in the tongue and groove or the squeak is coming from the joists or subfloor. This can be a framing problem in the joist area, a loose sub floor, flexing/ weak sub floor system, a milling problem in the tongue and groove of the wood flooring or the result of excess moisture and excessive drying. In the case of glued down flooring, insufficient adhesion or use of incorrect products may be the cause. Fixing the problem means identifying what is wrong. Shims, re-nailing and brackets can fix framing problems and top nailing or replacing boards can solve milling/adhesion problems.
WHAT KIND OF FINISH IS ON MY FLOOR?
Simple Test for Wax:
If there is any possibility that there is wax on the floor, we recommend doing both of the following tests to determine its presence. Do all tests in an inconspicuous area.
- Alcohol Test: Apply a small amount (about 3” diameter) of ethyl alcohol to the floor. Allow it to sit 2 minutes, and wipe up with a clean white rag. If the wiped area is dulled and there is a residue on the white rag, then your floor is probably waxed.
- Scratch Test: Scratch the surface with a finger nail. If your fingernail scratches the surface and buffing with a cloth erases it, you have wax.
- Water Drop Test: Place several drops of water on the floor. Leave them for at least one hour. If white spots develop where the water is, there is wax on the area tested.
If wax is found, floor care would involve re-waxing and buffing. To change the finish to one of the other finishes it would require a total sanding down of the floor to raw wood and applying a new finish. This is very common and relatively easy.
Simple Test for Surface Coats:
- Water Drop Test: If water beads up and can be easily wiped up leaving no marks behind, then you most likely have a surface coat.
- Scratch Test: A surface coated floor often gets scratches that can not be buffed out with a soft cloth.
- Alcohol or Mineral Spirit Test: Wipe a small area of floor with rubbing alcohol or mineral spirits. If the test area is not dulled and the sheen remains the same, the floor has a surface coat.